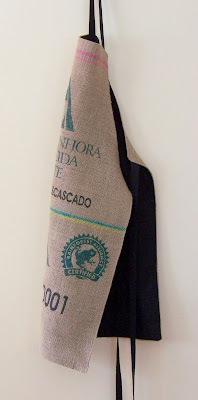
The bags are 28" x 40". This particular bag has an interesting motif on both sides, so one bag can be used to make two aprons. The burlap coffee sacks/coffee bags have not been laundered. I chose to wash and dry the sack to soften it up a bit and then ironed it.
To make a truly organic statement, I selected this lovely Oasis Organic Cotton as the coordinating lining fabric. Not only does it pick up the beautiful burgundy color of the coffee beans in the motif, but it will be soft for the person wearing the apron.
Supplies to make one apron:
- one coffee bag, washed, dried and ironed.
- 1 1/4 yards fabric for lining, washed and dried
- ruler
Instructions:
1. Begin by making three strips of fabric. Two of these will become the waist ties and the third will be the next strap. Lay out lining fabric with selvage edge folded together.
2. Cut three strips, each 4" wide. Shorten one of those strips to 24" (this will be for the neck strap.)
3. To finish the edge on the two long straps fold in 1/4" on one short end and press. (The other end will be on the inside of the apron.)
4. Fold strips in half with long edges together and press.
5. Open out strip and fold one long edge to meet the middle and press. Repeat with the other edge so that both raw edges are now folded and meeting at the middle.
6. Fold in half again so raw edges are completely enclosed and press.
8. Cut bag along edges.
9. Mark the center point of the motif. Even out the sides and bottom of bag. In this example, there was 5.25" to the right of the motif. So I cut off the excess on the left side for an overall size of 23.5" x 35".
10. Mark 5.5" to the left and right of the center point; mark 11.5" down on the sides.
11. Draw a curve between the two points and cut out that top portion of the apron. (You could also trace an existing apron.)
12. Use the cut out piece as a pattern to make the same cut on the other side.
13. Place lining fabric underneath the bag and cut out.
14. Pin ties to right side of lining, raw edges together. The shorter strip is the neck piece and the longer strips are the waist ties. The ties should be placed one inch from the sides edges.
16. Sew or serge using a small stitch length and a 1/2" seam allowance around the perimeter of the apron. Leave a 6" opening at the bottom. Trim curves and corners being careful not to trim too closely since the weave of the burlap is somewhat loose. Turn apron inside out and press; press the seams of the opening to the inside and pin.
17. Top stitch the entire apron using a fairly small stitch to secure the coffee bag to the lining and reinforce the weave of the burlap.
Enjoy!


.jpg)
No comments:
Post a Comment
Thank you for your comment.